
Install Clash Verge on Windows, Linux, and macOS
This guide provides direct and GitHub downloads for Clash Verge, installation notes for Windows, macOS, and Linux, subscription import steps, TUN and system-proxy configuration, and basic troubleshooting.
Download and install
- Clash Verge for Windows x64, with system-proxy and TUN support:
- Clash Verge for Intel and Apple Silicon Macs:
Debian / Ubuntu / Deepin: choose a
.debpackage matching your system architecture:CentOS / Fedora / SUSE: choose a matching
.rpmpackage from GitHub Releases.Arch Linux / Manjaro / SteamOS: follow the AUR route in the official installation guide. AUR is a community packaging channel, not a binary installer published directly by the project.
Install the package appropriate for your platform. This guide recommends Clash Verge because it has a graphical interface and integrated TUN support.
Platform notes
- Windows: Start with System Proxy for ordinary browser use. Configure service mode and TUN when an application does not use the system proxy; enabling both entry methods is not a universal installation requirement.
- macOS: Move the app to Applications, grant network permissions on first launch, and enable either the required proxy or TUN settings.
- Linux: Match the package to your distribution and architecture:
.debfor Debian / Ubuntu / Deepin,.rpmfor CentOS / Fedora / SUSE, and the AUR route for Arch-based systems. Then start the service and configure TUN according to the distribution's requirements. - Subscription: Have a valid proxy-service subscription URL ready to import.
Import and configure a subscription
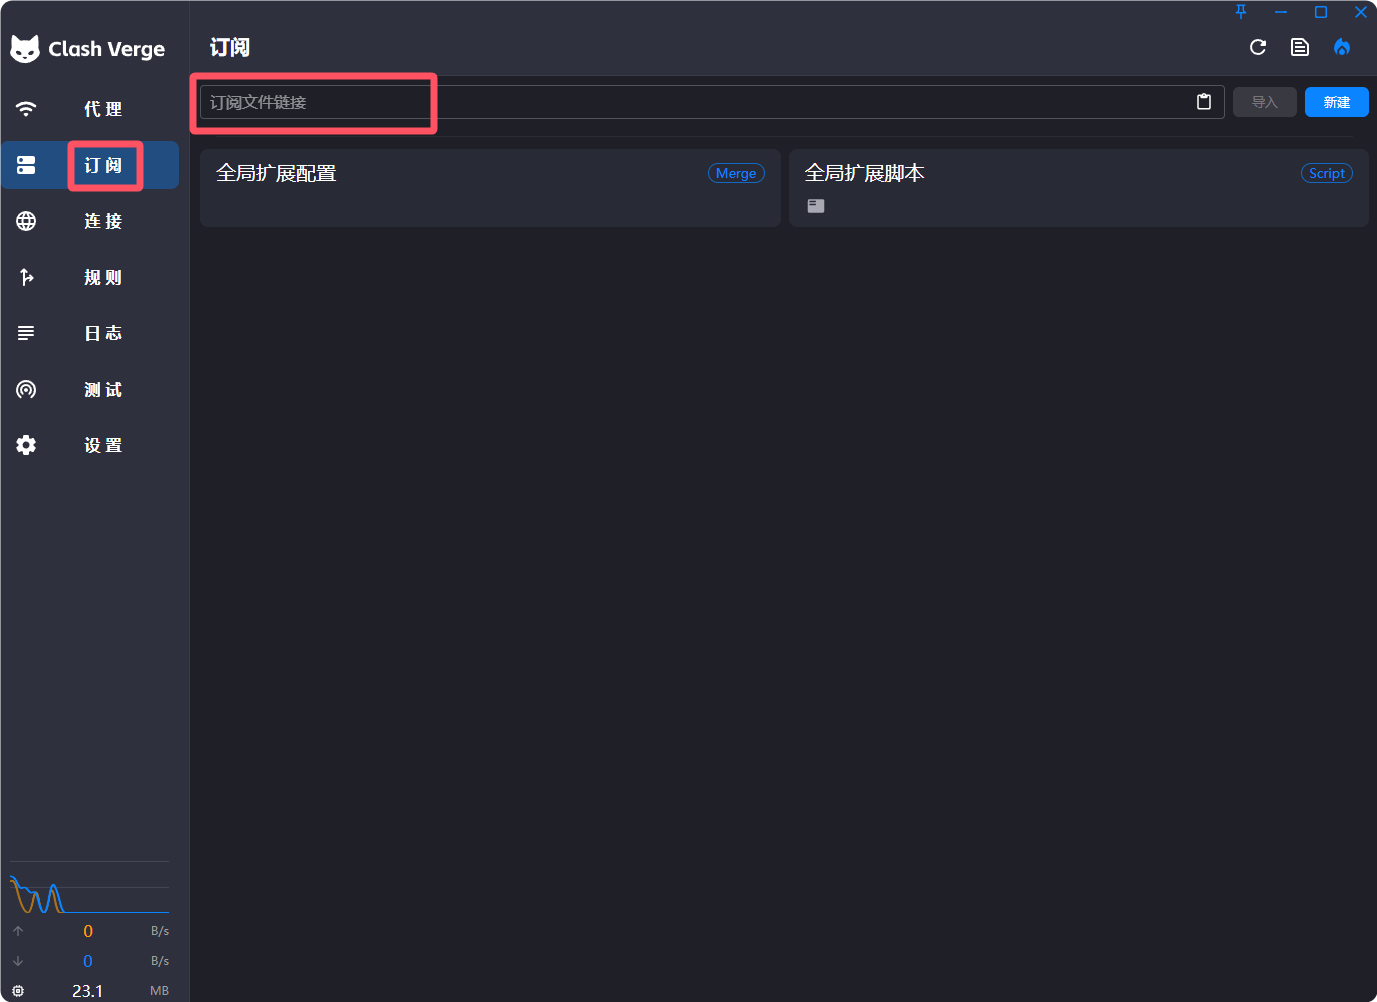
Open Profiles or Subscriptions, paste the subscription URL into the input, and select Import.
If you do not have a subscription URL, consult the proxy-service selection and review guide.
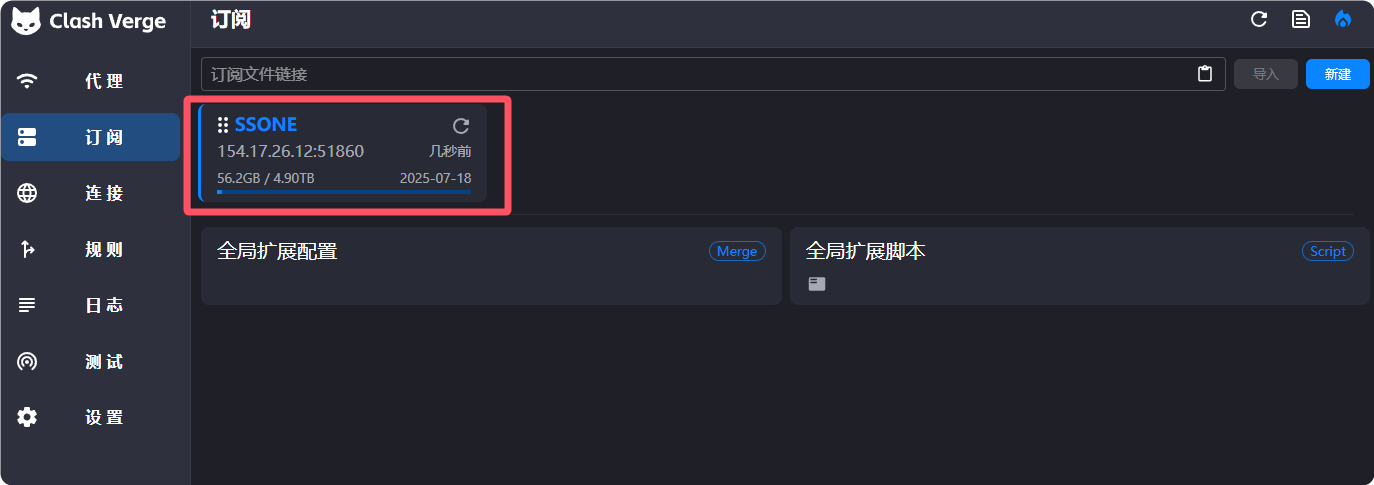
After a successful import, the subscription appears in the list.
The default update interval shown in the source guide is 1,440 minutes, or 24 hours. Adjust it if needed.
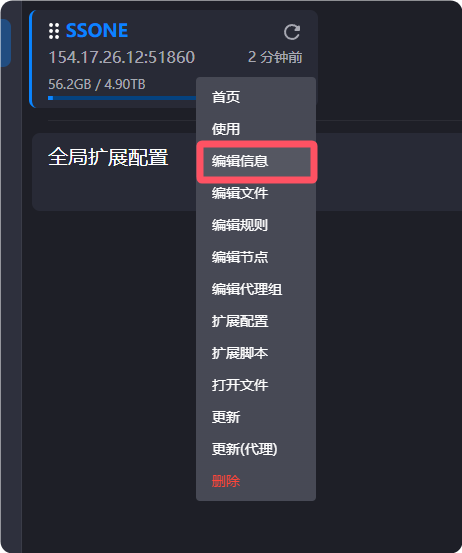
Right-click and select Edit Profile to change the update interval, URL, or name.
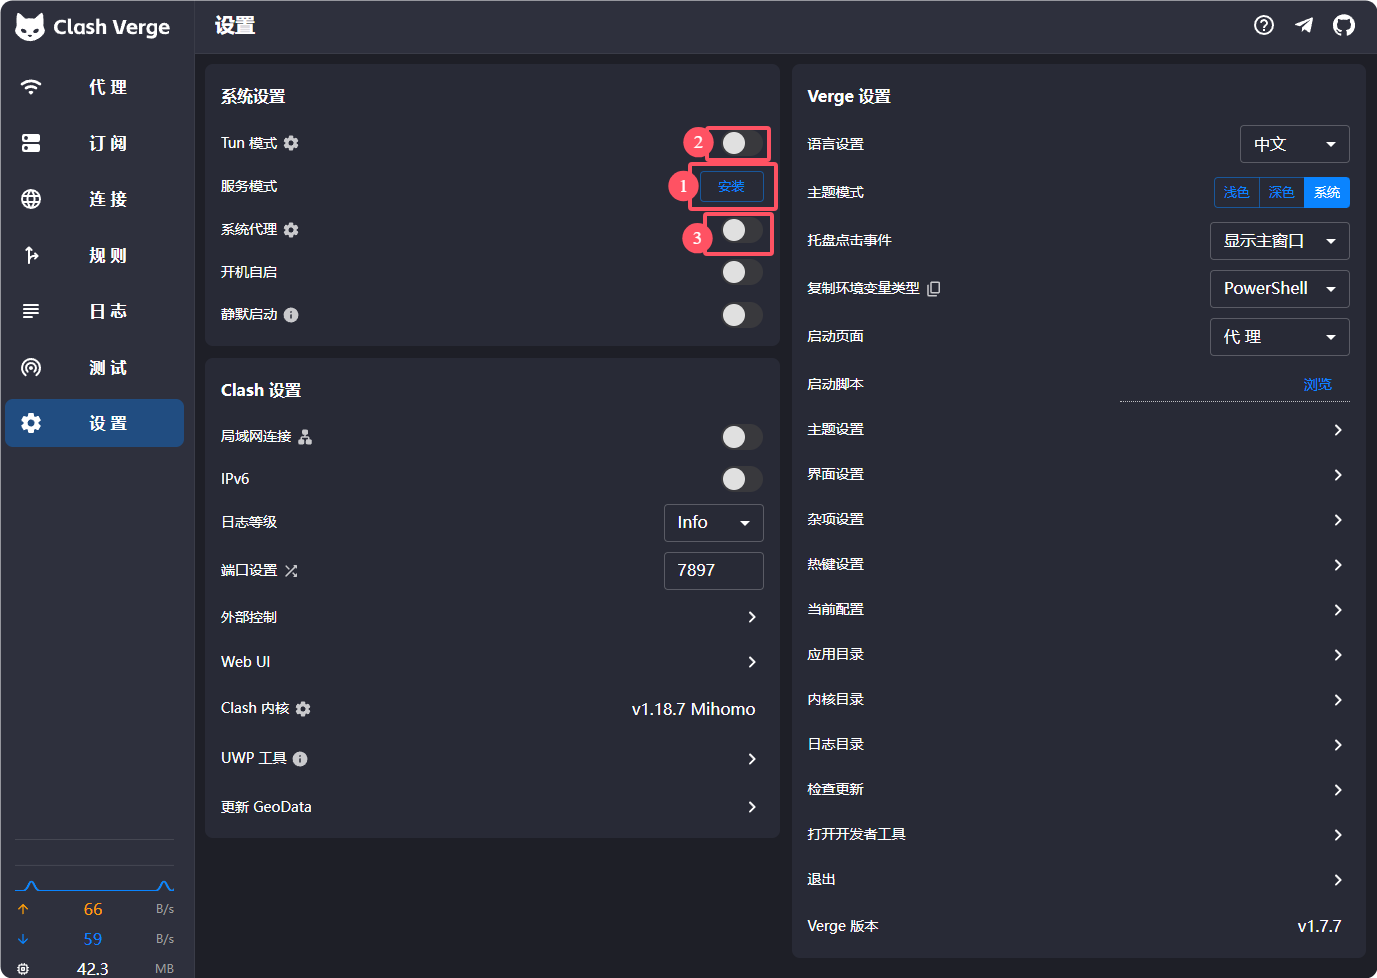
Choose the entry method for the application you need to use. The official quick-start guide distinguishes System Proxy for most browser use from TUN for applications that do not support the system proxy. Both switches do not have to be enabled to consider installation complete.
If TUN is needed, follow the current version and platform instructions to install and start the service, then enable TUN. Record the original settings, change one entry method at a time, and repeat the original operation in the target application. Restore the previous value if it does not help.

Finally, open Proxies and confirm that the mode is set to Rule.
Test the connection
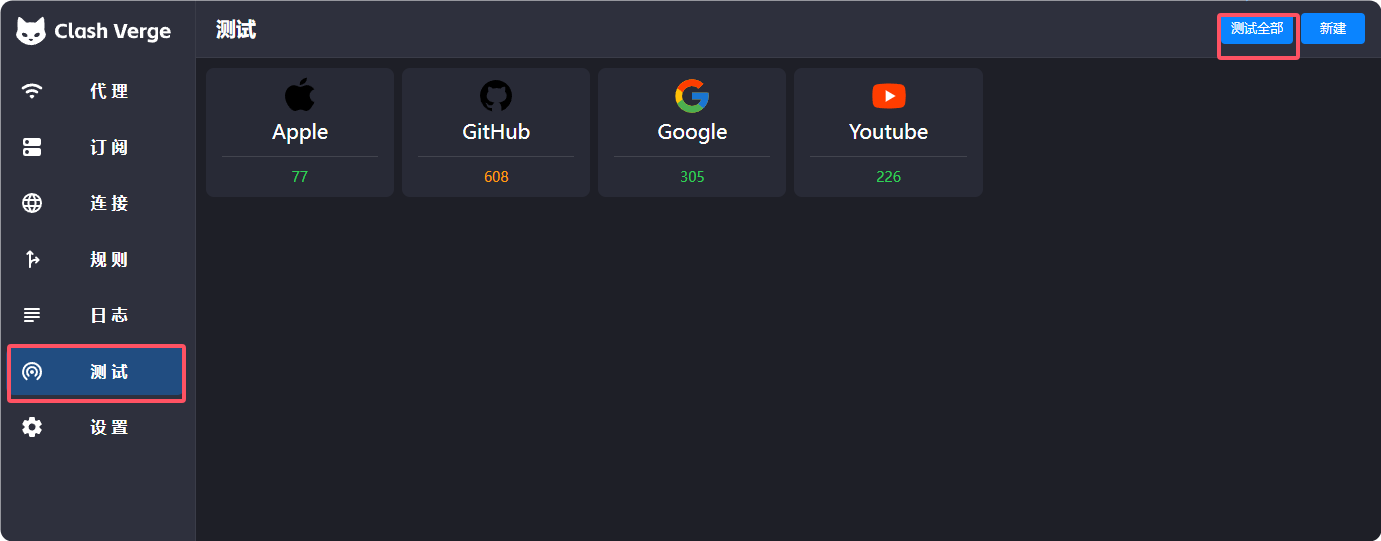
Open the test section and select Test All. Confirm that at least one intended node responds and that the websites you need actually open.
Frequently asked questions
- Download fails or is slow: Try the direct links above, use a different network, or use an existing working proxy to access GitHub.
- Subscription will not import: Confirm that the URL has not expired. Ask the provider for a current subscription URL if necessary.
- TUN will not start: Run with administrator or root privileges and close other VPN or proxy programs before retrying.
- Rule mode does not work: Confirm that Rule is selected on the Proxies page, then refresh the subscription.
Questions and updates
You may leave a comment with questions. If a reply is delayed, email admin@ermao.net.
For the most recent version of this guide, visit https://ermao.net/en/.